Installation Guide for Credit Card to Payables app
Permissions
To assign permissions required to use the Credit Card to Payables application:
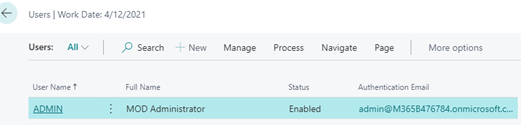
- Navigate to Users page and select the desired user.
- In the User Permission Sets fast tab, select Manage > New Line.

- Select the ellipsis to display Permission Sets available to add.

- Click the Search icon and type Purchase Invoice in the Search box.
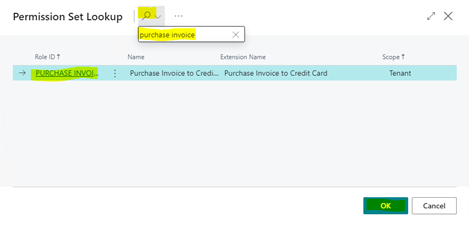
Select the Purchase Invoice to Credit Card permissions set.
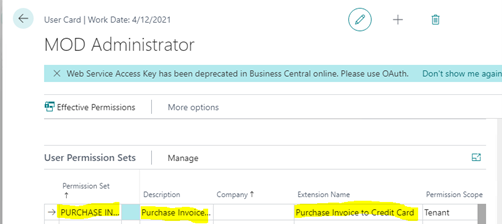
When complete, the permission set will look like this for the Credit Card to Payables app
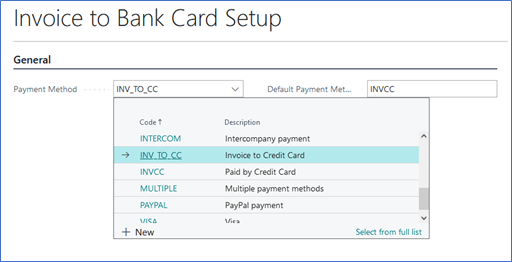
Invoice to Bank Card Setup
Select the payment method and the Default payment method to use with this product.
Tip
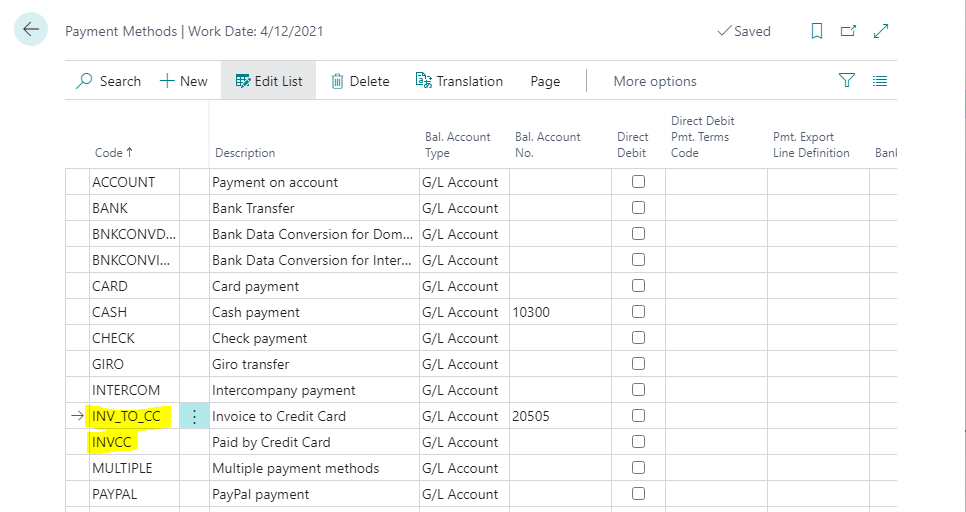
You can review or setup new payment methods by navigating to Payment Methods using the Search feature and type Payment Methods, then select related link.
- Payment Methods - set up one payment method for the Invoice to Credit Card account, and a second one for the Paid by Credit Card.

Important
Currently only one payment method is utilized, therefore only one GL account for credit cards can be used.
For the Payment method field, enter the Payment Method that has the GL liability account you want the credit card transactions to be posted to.
The Default payment Method will default into the Microsoft Dynamics 365 Business Central native payment method field to stop the end user from using another payment method, which would negate the Invoice to Bank Card Setup page. This method will not have a Bal. Account No. assigned.
Setup Bank Card Vendor
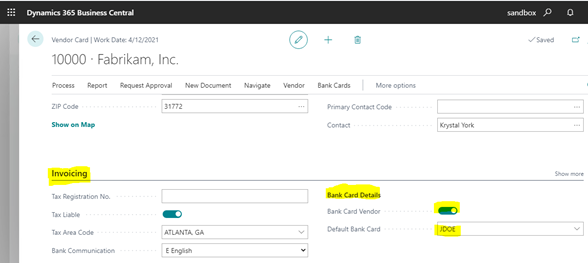
You should create a vendor card for each credit card company you wish to use with the Credit Card to Payables app.
- On the Vendor Card (for the credit card vendor) > Invoicing tab, toggle the Bank Card Vendor button on.
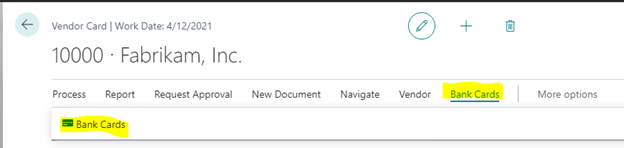
- Select Bank Cards from the ribbon and then select Bank Cards to set up who has a bank card for this vendor.
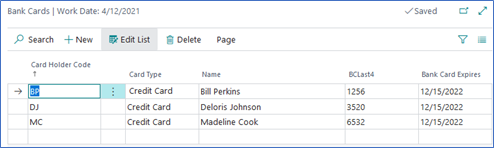
Select NEW to add a new bank card. This entry identifies which resource has which bank card:
- Card Holder Code: Enter the Card Code to be assigned to this Bank Card.
- Card Type: Choose Bank Card Type for the Vendor. Options are either Debit Card or Credit Card.
- Name: Enter a Description for this Bank Card (typically used to identify the resource who has this card).
- BCLast4: Enter the last 4 digits of the Bank Card assigned to this resource.
- Bank Card Expires: Enter the date the Bank Card Expires.
- Return to the Vendor Card and under Bank Card Details > Default Bank Card, select a bank card from the dropdown as the default card.
Tip
If you do not want to create vendor cards for each vendor you purchase from, you could create generic vendors for hotel, car rental, meals, office supplies, etc., then use these vendors when entering the expense receipts.
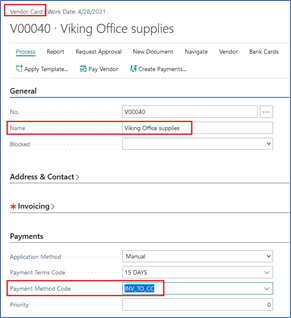
- On the Vendor Card > Payments be sure to select the Payment Method Code you created in the setup.
Payables and Receivables Setup
Caution
To avoid issues of getting an error message when posting an Purchase Invoice, be sure that the Purchases & Payables Setup > Number Series > Invoice Nos. and Posted Invoice Nos. Number Series are not the same series.
Credit Card to Payables Video
Learn about the Credit Card to Payables features that have been added, with the Credit Card to Payables Video: Credit Card to Payables App